Over the last decade or so, vinyl wrapping on vehicles has become hugely popular in countries all over the world. Vinyl wraps are ideal for a number of reasons.
To begin with, they give vehicle owners, a much more affordable way of changing the colour and style of their current vehicle, without the need to spend thousands upon thousands on a full or even partial re-spray.
On top of being affordable, they also help to protect the body work and paint work of the vehicle, protecting against the elements and various stone chips etc.
Finally, they offer vehicle owners a very diverse range of options when it comes to changing the colour and design of their vehicles, in a very convenient manner.
Whereas full re-sprays can take weeks to complete, vinyl wrapping a vehicle takes hours.
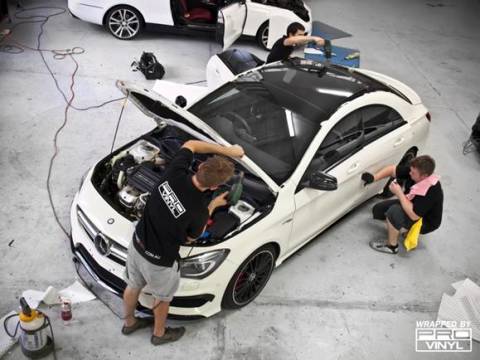
It can be done yourself, although a professional is recommended, but if you get your preparation done correctly, and you’d like to try your hand at vinyl wrapping a car, here is a basic step by step guide:
Remove any hardware that may cause issues
To begin with, if it can be removed, try to remove it as this will make life so much easier. That means registration plates, mirrors, door handles, aerials etc. You can simply vinyl wrap these items separately and just re-attach them at the end. Cover the glass with masking tape and basic newspaper.
Clean the car and begin with the roof
Next up, give the car a quick clean, thoroughly dry it, and begin vinyl wrapping. Start on the roof by laying a sheet of vinyl on the top so that it loosely hangs freely at both sides of the car. Next up, peel away the protective backing and very carefully and loosely lay the sticky side down onto the roof of the vehicle. Press away any visible air bubbles.
Finish the roof
Smooth any air bubbles and firmly press down the sticky vinyl using the plastic burnisher tool. Now, using a craft knife, carefully trim away the vinyl hanging down at the sides, getting as close to the edge of the roof as possible. Once the edges have been cut, firmly force them down.
Repeat on other parts of the car
Next up, repeat what you did on the roof of the car on other parts of the car, one area at a time. The bonnet (hood) of the car is ideally done next as it is another large area to cover. Make sure you trim neatly.
Now the tricky part –Next up is the trickiest part of the process, wrapping the mirrors. Take the mirrors which you removed earlier, and place the wrap along the top edge. Now, pull it tight and use a heat gun, or a hair dryer if you don’t have a heat gun handy, and use the hot air to allow you to stretch the vinyl around the curved parts of the mirror. Smooth it down, remove air bubbles, and trim it neatly. Repeat on the next mirror.
Neatening up –Finally, take a walk around your car and inspect your handy work. Trim and neaten any overhangs or uneven edges, and smooth out any air bubbles. For stubborn air bubbles, use your knife to pierce them, use your heat gun or hair dryer, and smooth them down. Once smooth the prick won’t be noticeable. Remove the paper from the windows and replace the handles, the registration plate, and anything else you removed before you began.